A Novice's Magneto Charge
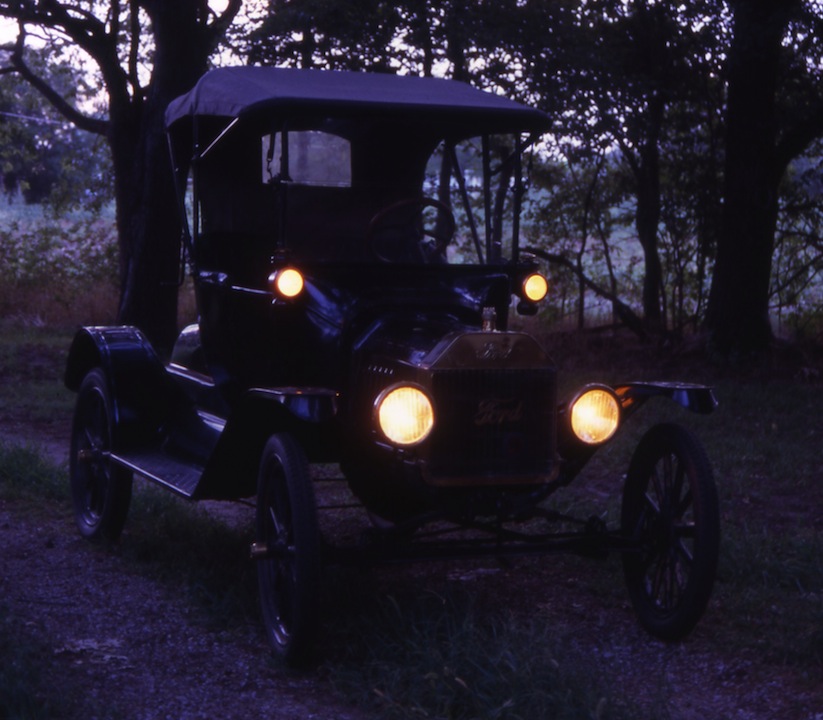 |
My
1915 runabout was like a lot of other Model T’s. It ran better on
magneto than on battery, and there was enough juice to light the
headlights, but I could never start it on MAG as Ford intended. It
started easily on the first pull of the crank when I cheated and used a
battery, but I could pull all day on MAG and the only result would be
lots of exercise. This was not a big problem for me because battery
starting was so easy, but when some other needed work prompted me to
pull the engine it was a good opportunity to do a magnet charge while I
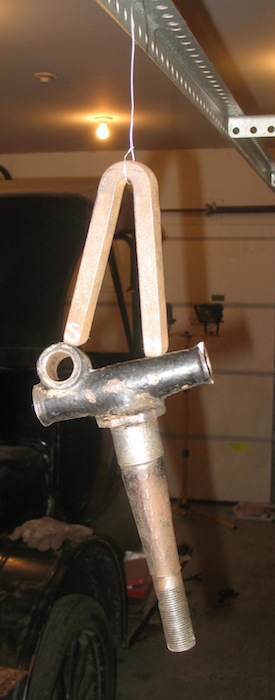
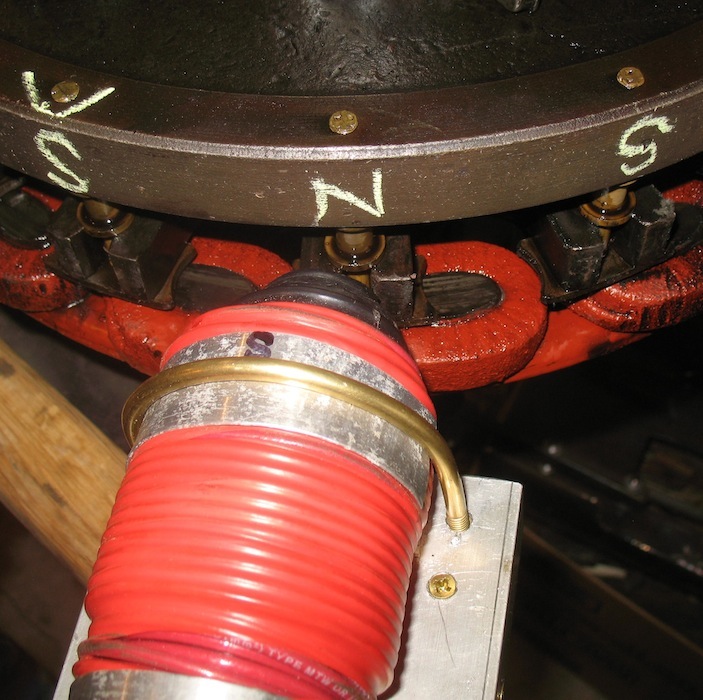
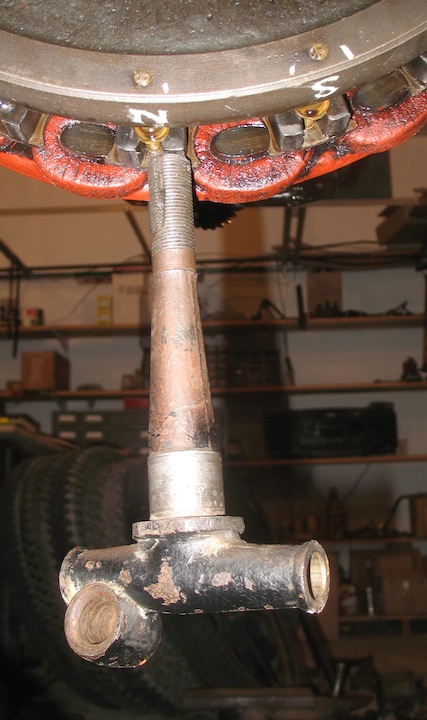
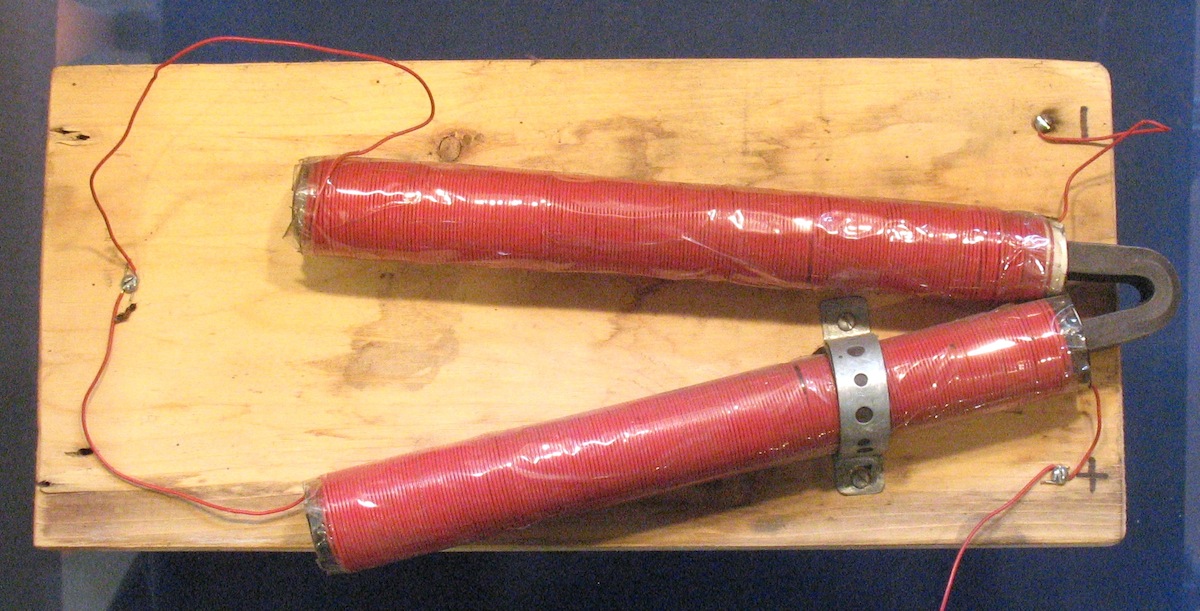
had the engine out. So here’s a story for novices, by a novice. I had never done this before, so the first thing was research. I read about several approaches to skinning the magneto-charge cat. All of them take multiple batteries in series to produce 24 or 36 volts. Some folks use a DC welder. The easiest method is the basic in-car charge. It involves only hooking up jumper cables in the right way. The main tool required is a compass. This was covered by Dan Conder in the November/December 2010 Vintage Ford. It’s also in the excellent MTFCA book, The Electrical System, which also gives instructions for the other methods. The simple in-car charge is enough for lots of folks, especially when their magnets are so weak before charging that it makes a big improvement in the car’s running. But I knew from my reading that other methods produce a stronger charge, which is what I wanted. The basic in-car charge uses the coil ring as the charging electromagnet, and as it’s used in the vehicle it doesn’t come in direct physical contact with the magnets. It’s close, but doesn’t touch. I’ve seen different estimates of the strength of the charge. Some say the simple in-car charge gives the magnets 60% of the charge produced by full contact. I’ve also seen a claim of 80%. The next method is a variation on the first. It’s also done in the vehicle, but with the hogshead removed so a charging coil can be put in direct physical contact with each individual magnet. Of course, this gives a stronger charge. You can test the magnets by placing a piece of steel on them and using a fish scale to pull it off. When it takes two pounds of pull, you have your charge. If the engine is out and the transmission is off, you can lay a field coil on the magnets to charge them. If the transmission isn’t off, you can unbolt the ring from the block and move it back against the magnets. If everything’s apart, and the magnets are off the flywheel, you can charge them individually with a charging coil. 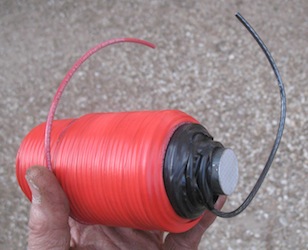 As my transmission worked just fine and appeared to be in good shape, I didn’t see any reason for complete disassembly. I decided on charging the individual magnets with a charger made for the purpose. I based my charger on the one Jim Golden posted on the MTFCA forum. The important part of the device is the electromagnet. I used a core of one inch hot rolled rod six inches long, and wrapped a hundred feet of 12 gauge wire around it with electrical tape to keep the wire in place. |
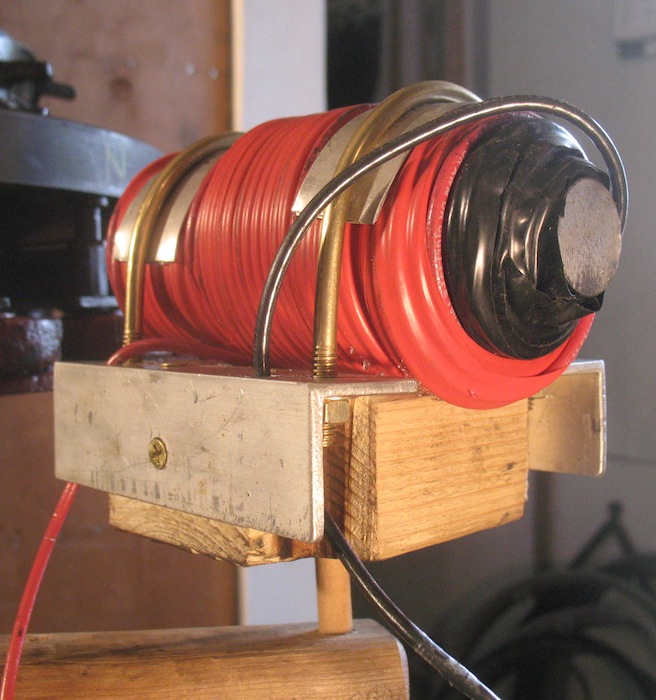 I
mounted the coil on a wood base with aluminum hardware held in place by
brass wood screws. A pair of toilet float rods with brass nuts hold the
coil on the base. Pieces of aluminum flashing folded in three layers
keep the rods from digging into the coil. I don’t know if all that
non-ferrous stuff is necessary or helpful, but that’s the way I did it.
|
|
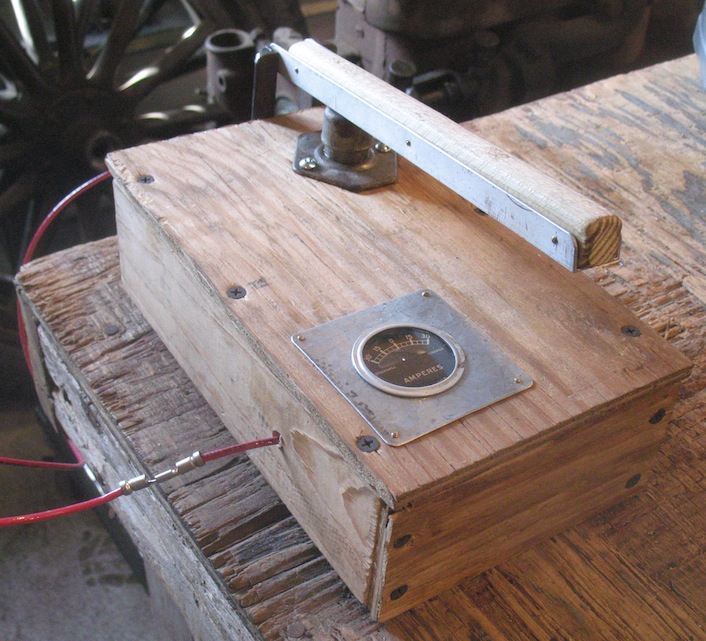 The
control box is very simple. In
fact, the one I made could have been even simpler. I included an
ammeter as an indicator to show me that the switch was working
properly. That proved a waste of effort. When the current is applied
you can see the charger jump against the magnet. Even though the core
is touching, it moves to make full contact, so the ammeter is
superfluous.
|
|
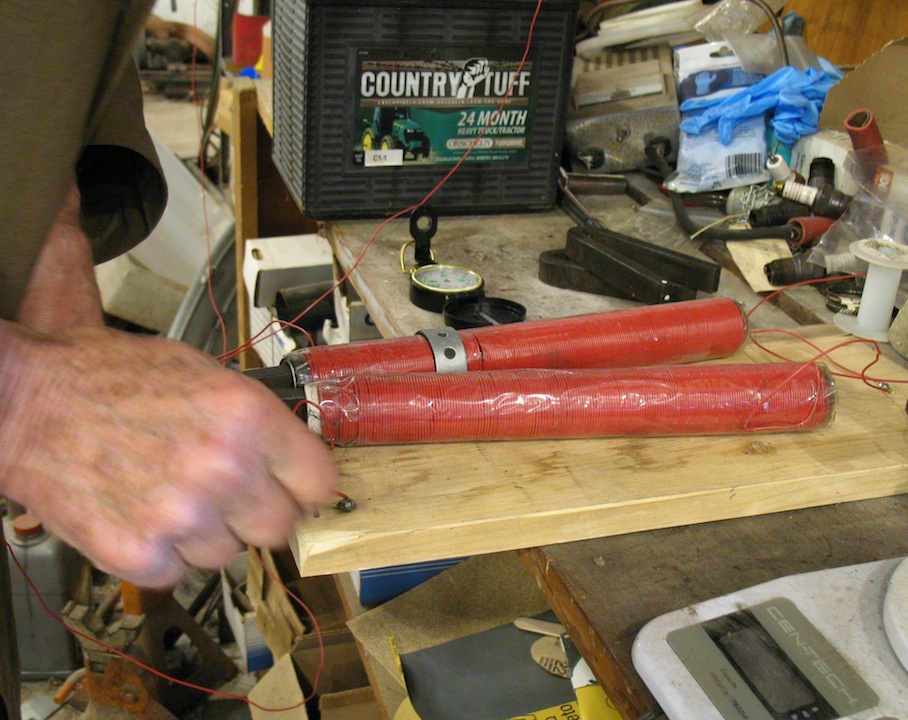
 The
working part of the control is a starter switch I bought at a
swap meet for $2.50 with a lever across it to make it easy to push
down. The rest of the charging set-up is just wires to the coil and the
batteries, and cables connecting the batteries together.
|
 The additional tools are a
test
weight (I didn’t have a fish scale) and
a compass. The traditional recommended weight is an iron piston, said
to weigh two pounds, but I didn’t have a loose one. So I took a perch
with nut and a spindle to the post office and had them weighed. The
perch was a little over a pound, but the spindle was 2 pounds 2.1
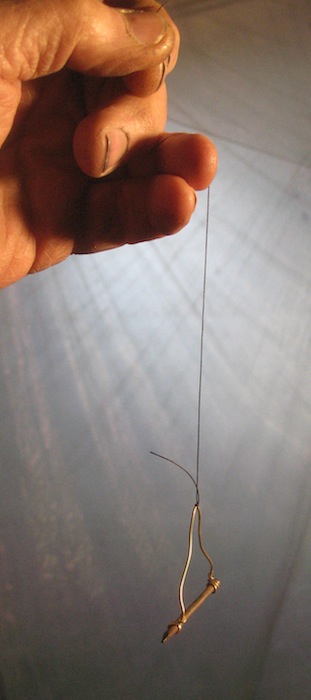
ounces. That would do. For a compass I just zapped a nail with the
charger a few times and hung it with a bit of brass wire and a thread.
|
|
 Some may
find
this next part
unnecessary, but I’ve had bouts of senioritis all my life. Not wanting
to lose track of what I was doing in an absent-minded moment, I used
the compass to identify all magnetic poles, and marked them with chalk.
As we learned in grade school, opposite poles attract. The pointy end
of the nail aimed north, so that was its south pole. All the poles that
attracted the point got an N, and the ones that attracted the blunt end
got an S.
|
 I also identified the poles of the charger and marked them with a felt pen. |
 Next
came testing. I happen to
have an old magnet that’s been here on the farm since I was a little
kid. Until I got into Model T’s, I never realized what kind of magnet
it was. It had only enough magnetism left to pick up a few small nails.
After several zaps with the charger it would hold the perch, and with a
few more it held the spindle. I was ready to move on to the real
thing.
|
 The first day I used just
a
single twelve volt battery. I had read that the magnetizing is done not
by a steady current, but by repeated fluctuations between full current
and none. So I applied the current with a dozen quick taps of the
lever. In this first session I set the pole of the charger against each
pair of magnet poles, south pole of the charger against a pair of north
poles, then the north pole against a pair of south poles, and so on,
all the way around the flywheel.
|
|
 When I turned the engine
horizontal and applied test weights, I found that all the magnets would
hold the perch (one pound), but only a few pairs of magnet poles
would support the spindle. It was time to up my game.
|
|
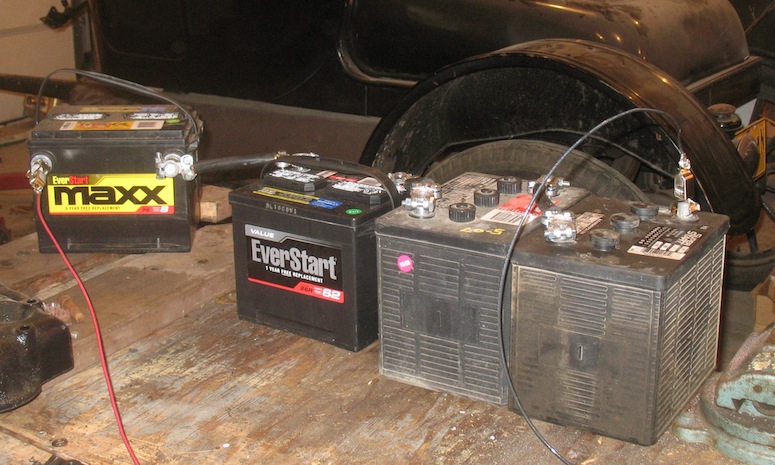 Overnight I charged some
batteries, and on the second day I used four of them: two twelve volts
and two sixes. I suppose other combinations to make 36 volts would do
as well, but these were what I had handy.
|
 This time, instead of
setting
the
charger core against each pair of poles, I charged one pole at a time.
My aim was to get each pole of each magnet to hold the spindle without
any help from a nearby pole. Yes, I realize there’s a steel plate
connecting two adjoining poles, but I pretended there wasn’t and dealt
with each pole individually.
|
|
|
 After once around the
flywheel,
three individual poles held the
spindle. After another time around, six held it, then nine, then
seventeen, and finally I got all thirty-two individual poles to hold
the weight. There was some variation. Some were strong enough to hold
it immediately with no adjustment. Others weren’t quite as strong, and
the spindle would drop off until I touched it to the pole at just the
right angle. But eventually all poles supported the spindle and I
declared victory.
|
|
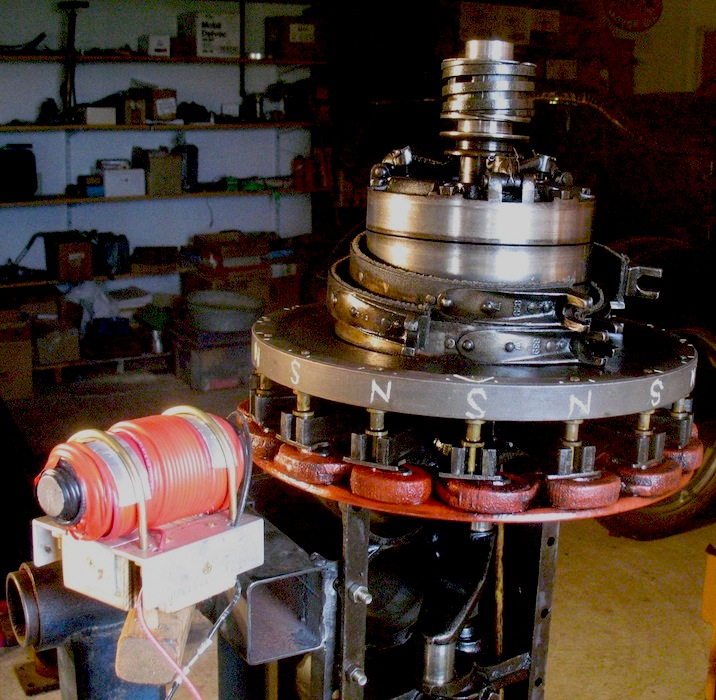
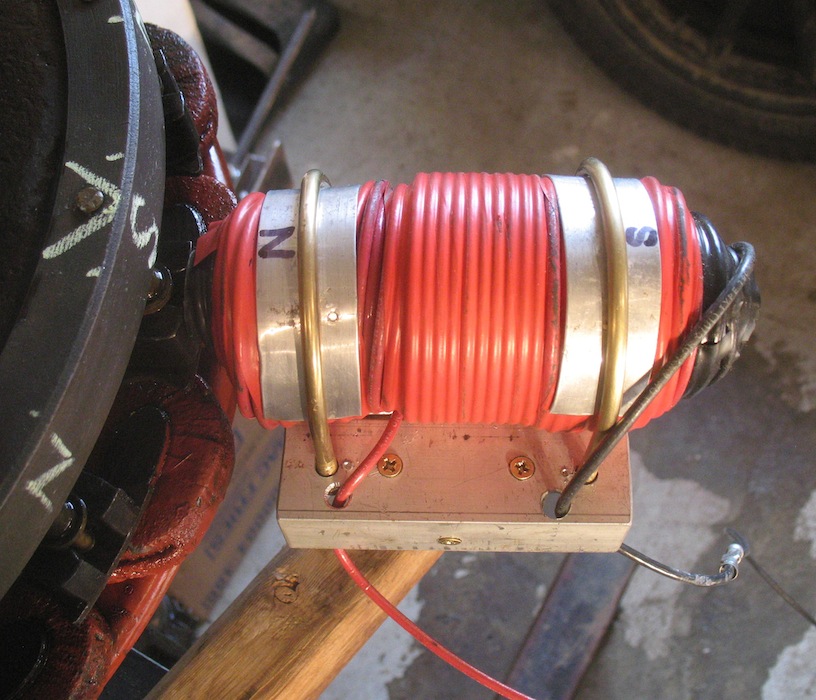
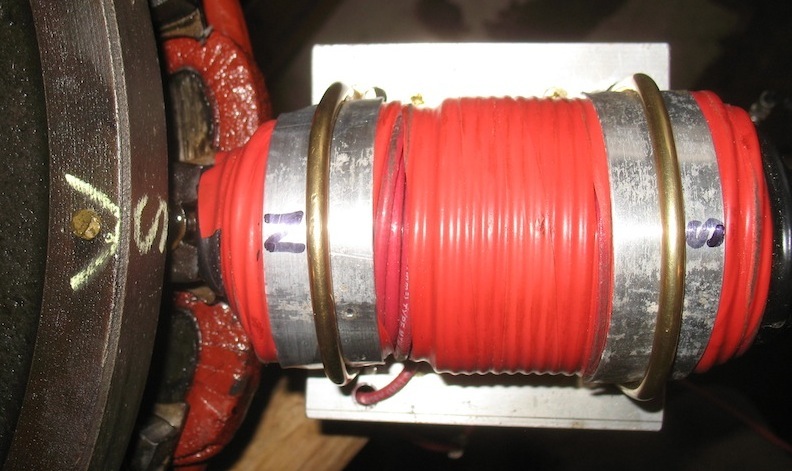
I did my next magneto charge
with the magnets off the flywheel. This is the most effective way,
producing the strongest charge. I made a new set of charging coils, one
for each post of the magnet. Each coil is mostly a steel core made from
an eight inch piece of old axle shaft, but with an additonal length of
plastic pipe, and about a hundred feet of 20 AWG wire wrapped around
it. The magnet sits inside the plastic pipe and contacts the steel
core. One coil is mounted on a board and the other remains moveable for
inserting the magnet.
 Brushing a wire from the
battery against the terminal screw flashes the magnet.
|
 With this method each
magnet held a four pound weight.
|
Revised May 5, 2019
VEHICLE INDEX
HOME