Sometimes, because of repeated heating and cooling
over the years, the exhaust manifold becomes warped. Each of
the four exhaust ports in the block  should have a gland ring inserted
in it. Each gland ring (Part #3064) fits into the
corresponding hole in the manifold to keep the hole in line
with the port. When these rings are missing, the weight of
the exhaust pipe on the end of the manifold can pull it down
and warp it so the holes don't line up with the ports,
sooner or later causing exhaust leaks. At a swap meet I paid
$10 for a manifold that looked brand new but wasn't
straight. Having read about manifold straightening on the
MTFCA forum and the Tulsa and Long Beach Model T clubs'
websites, I decided to make a jig and try it myself. I went to the local welding supply
and overpaid for eighteen inches of eight-inch I-beam. I
found no suitable scraps in the salvage yard, so I spent
almost $40 for a new piece. The yardman had just cut off
the piece for me and I was carrying it into the office to
pay for it when a truck drove in with a load of scrap that
included exactly what I needed. If I'd been ten minutes
later I'd have paid much less than half of what I spent for a new piece. Ah well, c'est la vie.
should have a gland ring inserted
in it. Each gland ring (Part #3064) fits into the
corresponding hole in the manifold to keep the hole in line
with the port. When these rings are missing, the weight of
the exhaust pipe on the end of the manifold can pull it down
and warp it so the holes don't line up with the ports,
sooner or later causing exhaust leaks. At a swap meet I paid
$10 for a manifold that looked brand new but wasn't
straight. Having read about manifold straightening on the
MTFCA forum and the Tulsa and Long Beach Model T clubs'
websites, I decided to make a jig and try it myself. I went to the local welding supply
and overpaid for eighteen inches of eight-inch I-beam. I
found no suitable scraps in the salvage yard, so I spent
almost $40 for a new piece. The yardman had just cut off
the piece for me and I was carrying it into the office to
pay for it when a truck drove in with a load of scrap that
included exactly what I needed. If I'd been ten minutes
later I'd have paid much less than half of what I spent for a new piece. Ah well, c'est la vie.
So here are some pictures showing the project and its results.
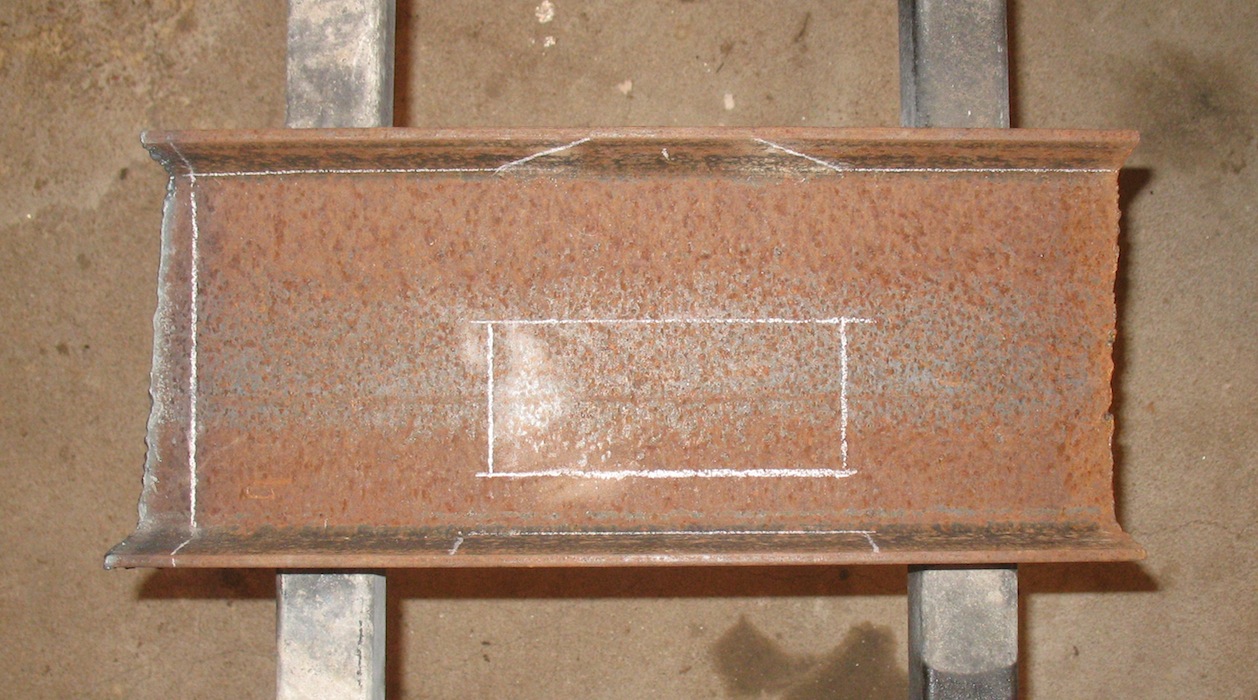
The raw material.
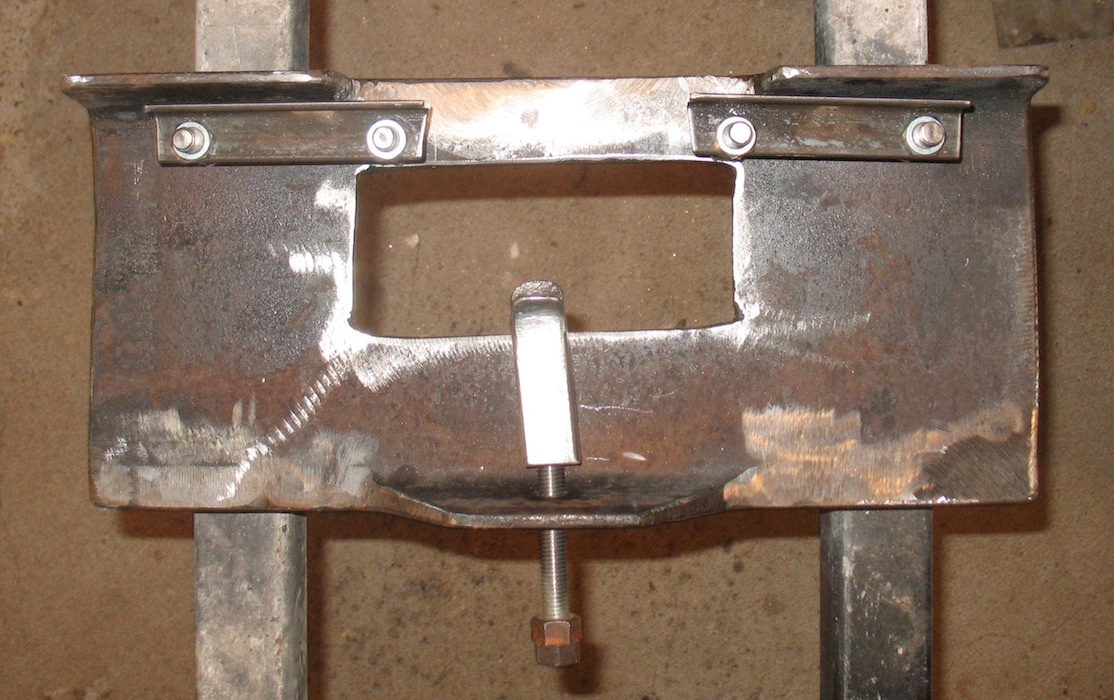
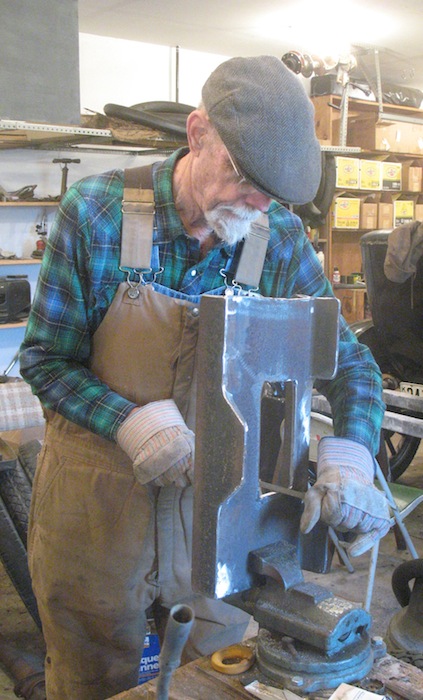
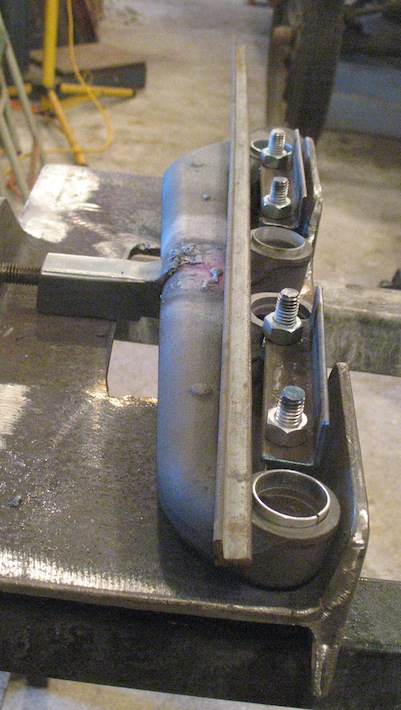
The finished jig includes a 6"piece of 1/2" coarse threaded rod to exert force on the heated manifold, and a pusher with a curved end that fits against the manifold. The pusher is made of a piece of square tubing with a bit of pipe to provide the curve on the end. A large opening in the base allows for heating the manifold from below.
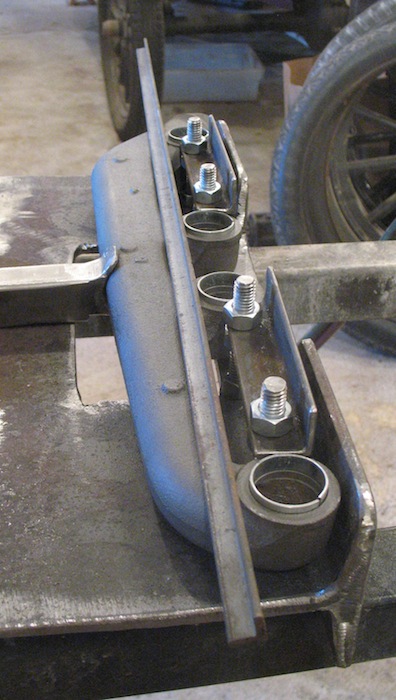
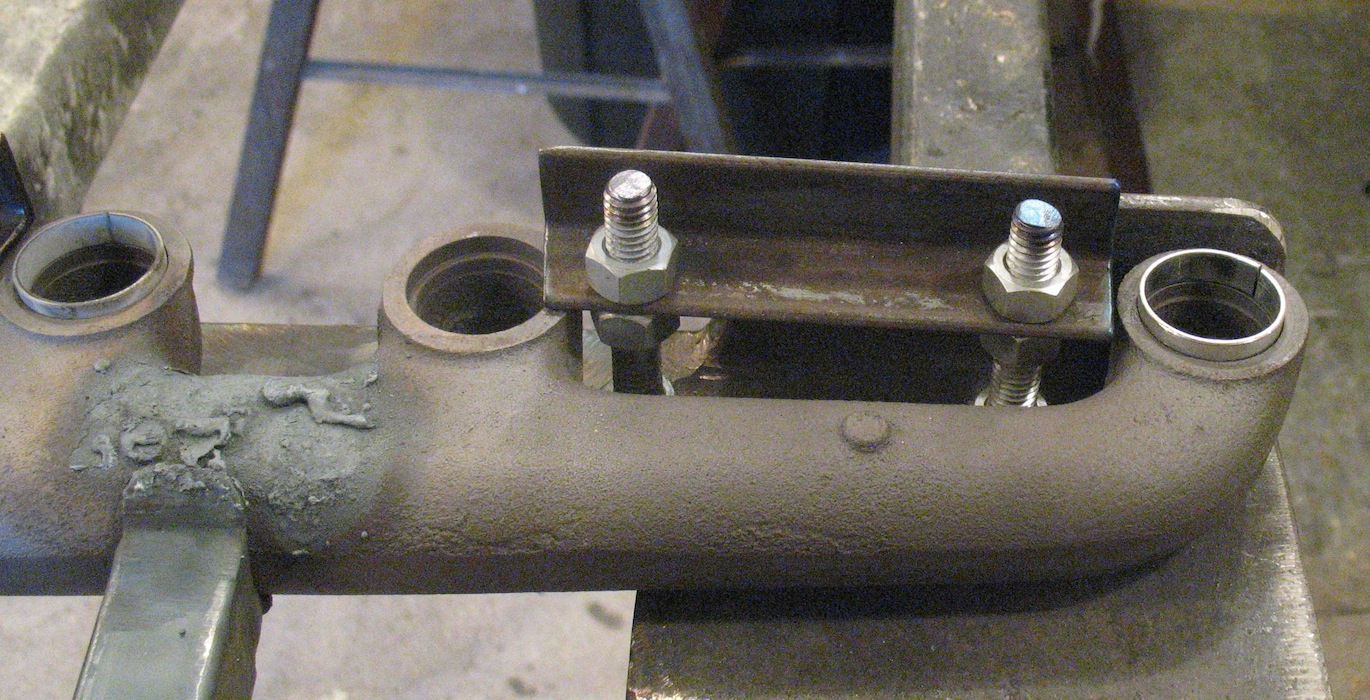
Gland rings are inserted in the manifold holes to facilitate checking for straightness.
Pieces of angle iron that fit between the rings are adjusted just high enough to let the manifold slide under them. They are to hold it down flat on the jig.
Update:
After this first attempt ruined a 26-27 manifold almost five years ago, I didn't have occasion to attempt another straightening until a couple of years ago. The exhaust manifold I had to install on my touring car had excellent threads and looked good, but was warped enough to prevent it from fitting properly. A straight edge across the first three gland rings showed that the fourth was about 3/32" out of line. That wasn't very much, so I decided to try straightening it. This time I was very careful to watch what I was doing when I applied the heat, both from above and from below. When I finished I was delighted to find that the straight edge showed it straight, and I was even more delighted to find that it was a good fit on the engine. This works best when you straighten a slightly warped manifold rather than one that's way out of alignment. Having done it successfully several times now and also failing on a few, I wouldn't hesitate to try it again on a manifold out of line by a quarter inch or less. For one that's warped more than a quarter inch I wouldn't bother. Some people claim that straightening a manifold uses up too much acetylene to be cost effective, but I don't think what I used on the ones I've done was enough to cost anywhere near the price of a new manifold.
Updated October 31, 2019
Update:
I have found that manifolds which are warped ¼" or less can be straightened without damage. With any that were warped more than that I found that they cracked before I could get them straight. One person suggested I should start the straightening on one of those badly warped ones, go about half way, quit and let it cool, and finish it the next day. I haven't tried that, but I will the next time I straighten more manifolds.
Updated August 15, 2021
Here's a link to the Tulsa Model T Club manifold jig page.
Tulsa manifold jig
HOME
VEHICLE LIST
should have a gland ring inserted
in it. Each gland ring (Part #3064) fits into the
corresponding hole in the manifold to keep the hole in line
with the port. When these rings are missing, the weight of
the exhaust pipe on the end of the manifold can pull it down
and warp it so the holes don't line up with the ports,
sooner or later causing exhaust leaks. At a swap meet I paid
$10 for a manifold that looked brand new but wasn't
straight. Having read about manifold straightening on the
MTFCA forum and the Tulsa and Long Beach Model T clubs'
websites, I decided to make a jig and try it myself. I went to the local welding supply
and overpaid for eighteen inches of eight-inch I-beam. I
found no suitable scraps in the salvage yard, so I spent
almost $40 for a new piece. The yardman had just cut off
the piece for me and I was carrying it into the office to
pay for it when a truck drove in with a load of scrap that
included exactly what I needed. If I'd been ten minutes
later I'd have paid much less than half of what I spent for a new piece. Ah well, c'est la vie. So here are some pictures showing the project and its results.
The raw material.
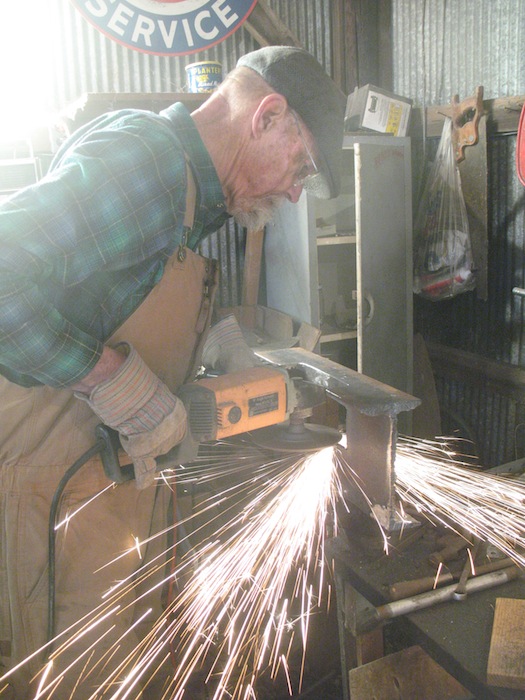
 Cutting and grinding. |
 |
 Filing and tapping. |
 |
The finished jig includes a 6"piece of 1/2" coarse threaded rod to exert force on the heated manifold, and a pusher with a curved end that fits against the manifold. The pusher is made of a piece of square tubing with a bit of pipe to provide the curve on the end. A large opening in the base allows for heating the manifold from below.
Gland rings are inserted in the manifold holes to facilitate checking for straightness.
Pieces of angle iron that fit between the rings are adjusted just high enough to let the manifold slide under them. They are to hold it down flat on the jig.
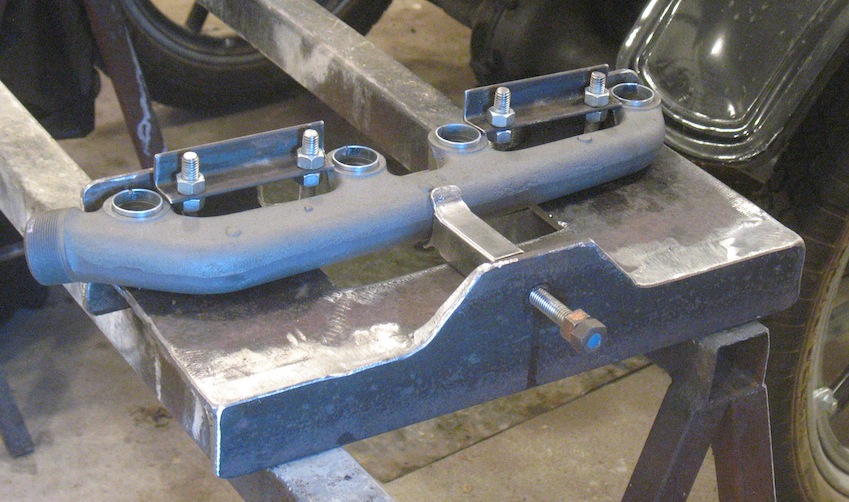
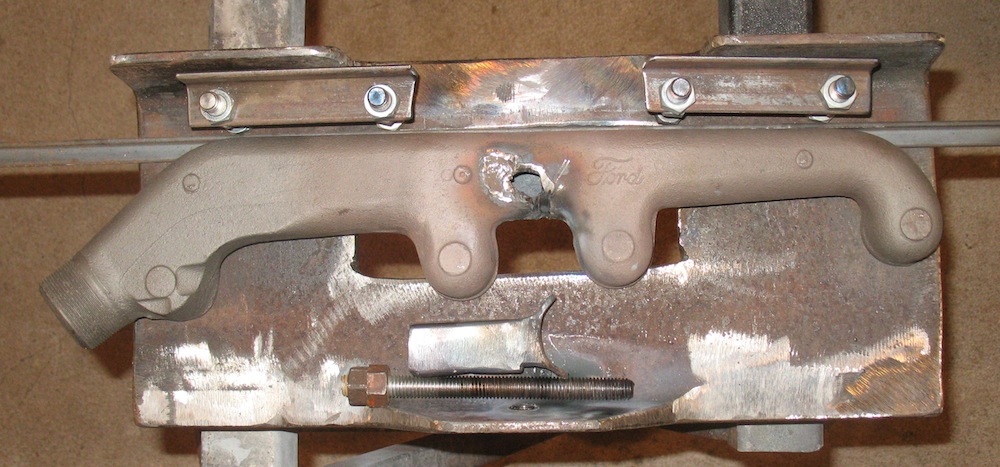
 A straight edge set
against the rings on #2 and #3 shows how much #1
and #4 are bent out of line.
|
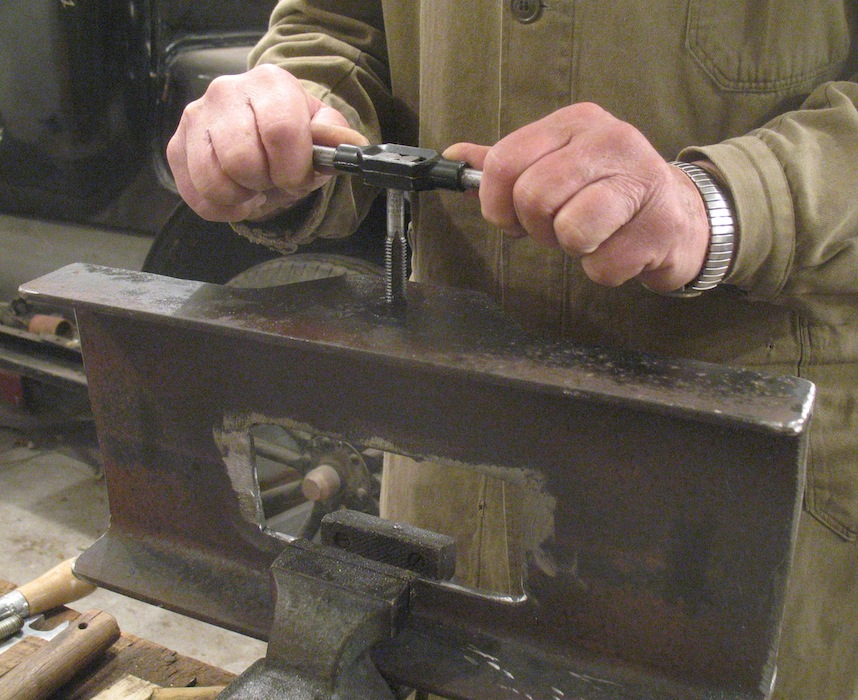
 In all my reading about
this process, many have stressed that it's best to
rely on only the weight of the wrench to turn the
rod and force it against the manifold. As the heat
softens the manifold the wrench is supposed to
slowly descend solely by gravity. But I have to
confess that occasionally the turning rod stuck,
and I had to help it along. That said,
I used minimum force applied very slowly.
|
 I was very pleased with
myself when I checked the manifold for
straightness.
|
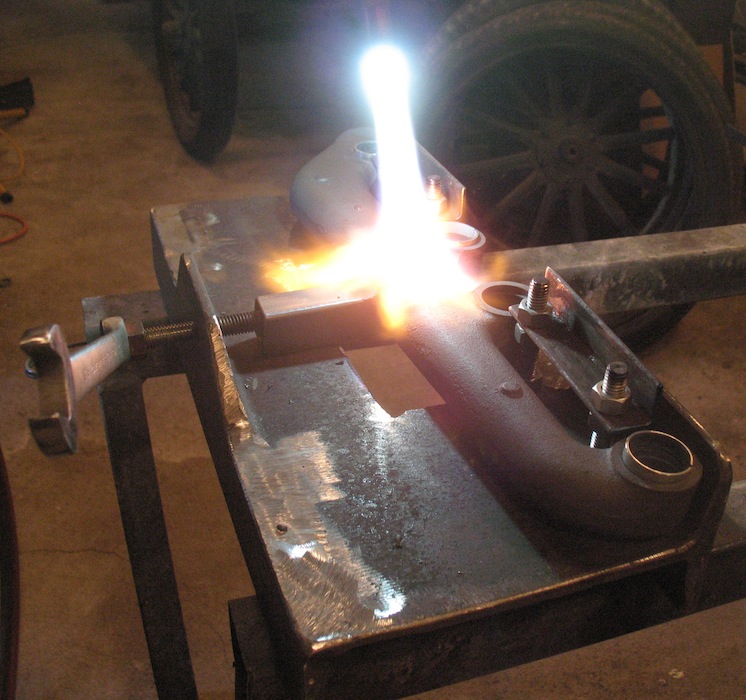
 But I found during straightening that removing the bend in the middle also moved #1 and #2 farther from #3 and #4, and I had to pull the ring out of #2 to let the manifold move. I think my answer to this will be longer pieces of angle iron that will go over the rings instead of between them. |
 My pleasure at the results died when I turned the manifold over and saw what happened where I heated it from below. Obviously, I got the heat source too close. Fortunately I have several junk manifolds I can use for practice until I really learn how to do this job. This is definitely something to avoid. I consulted a shop that does cast iron repair and was advised that having this manifold fixed would cost about the same as buying a new one. |
Update:
After this first attempt ruined a 26-27 manifold almost five years ago, I didn't have occasion to attempt another straightening until a couple of years ago. The exhaust manifold I had to install on my touring car had excellent threads and looked good, but was warped enough to prevent it from fitting properly. A straight edge across the first three gland rings showed that the fourth was about 3/32" out of line. That wasn't very much, so I decided to try straightening it. This time I was very careful to watch what I was doing when I applied the heat, both from above and from below. When I finished I was delighted to find that the straight edge showed it straight, and I was even more delighted to find that it was a good fit on the engine. This works best when you straighten a slightly warped manifold rather than one that's way out of alignment. Having done it successfully several times now and also failing on a few, I wouldn't hesitate to try it again on a manifold out of line by a quarter inch or less. For one that's warped more than a quarter inch I wouldn't bother. Some people claim that straightening a manifold uses up too much acetylene to be cost effective, but I don't think what I used on the ones I've done was enough to cost anywhere near the price of a new manifold.
Updated October 31, 2019
Update:
I have found that manifolds which are warped ¼" or less can be straightened without damage. With any that were warped more than that I found that they cracked before I could get them straight. One person suggested I should start the straightening on one of those badly warped ones, go about half way, quit and let it cool, and finish it the next day. I haven't tried that, but I will the next time I straighten more manifolds.
Updated August 15, 2021
Here's a link to the Tulsa Model T Club manifold jig page.
Tulsa manifold jig
HOME
VEHICLE LIST